A French manicure is defined by a natural-looking base and a contrasting tip, usually following the curved free edge of the nail. The clean tip line may look simple, but symmetry, sizing, surface preparation, and adhesive choice all affect how polished the result looks and how well it wears.
You can create French tip nails with polish, guides, stamping tools, or pre-designed press-ons. Painting offers creative control, while French press-on nails provide the most consistent at-home result with the least technical effort. This guide explains each method and gives you a complete process for fitting, applying, checking, and removing French press-ons.
Quick Checklist: What You Need for French Tip Nails at Home
For a neat French look, start with clean, dry nails, choose a method that suits your skill and schedule, and give the polish or adhesive enough time to set. Press-ons are especially practical when you want consistent tips and a salon-style result in about 10 minutes without drawing each curve by hand.
- Clean, completely dry natural nails
- A nail file
- A wooden cuticle stick or similar cuticle tool
- A prep pad or suitable alcohol-based nail cleanser
- Your chosen polish, guides, stamping tools, or French press-on set
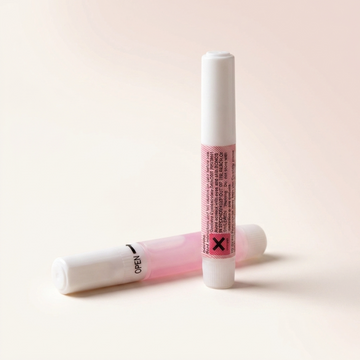
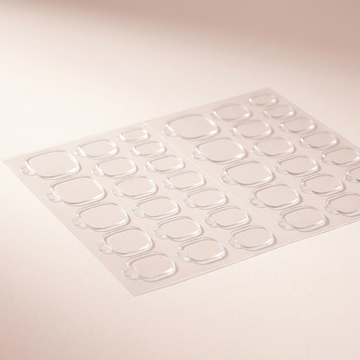
- Nail glue for longer wear or adhesive tabs for 1–7 days of short-term wear
- A clear workspace where you can arrange every nail in order
Glue provides a stronger bond and is the appropriate option when longer wear matters. Adhesive tabs make removal easier and work better for a short event or temporary style change.
What Are French Tip Nails?
French tip nails have a sheer, nude, or pale base with a defined contrasting tip. Traditional versions use white tips, but the same base-and-tip structure can also support coloured, chrome, glitter, micro, or sculpted tips.
The curved line between the base and tip is often called the smile line. Its width and shape influence the overall effect. A narrow tip on a shorter nail tends to look understated, while a wider tip or longer sculpted profile creates a bolder finish.
A French manicure is therefore a design structure rather than one fixed combination of white polish and pale pink. The base remains visually separate from the tip, even when the contrast is created with mocha, black, metallic, or textured details.
How Can You Do French Tip Nails at Home?
You can paint the tips freehand, use guides or stamping tools, or apply pre-designed French press-ons. The right method depends on how much time, precision, and design control you want.
| Method | Time or skill demand | Creative control | Finish consistency | Best use case |
|---|---|---|---|---|
| Freehand polish | Requires a steady hand, practice, and drying time | High | Depends on painting skill | Custom colours and tip widths |
| Guides or stamping | Moderate; placement and compatible tools matter | Moderate to high | More repeatable than freehand painting | DIY polish users who want help creating even curves |
| French press-ons | Low once the nails are sized and prepared | Limited to the chosen design | Consistent shape and tip placement | A fast, polished result without painting or a curing lamp |
Freehand French tips
Freehand painting gives you control over colour, curve, and tip width. It is inexpensive if you already own suitable polish, but creating matching smile lines across ten nails takes practice. You also need to account for drying time between the base, tip, and top coat.
French tips with guides or stamping tools
Guides help define the tip boundary, while stamping tools can transfer a curved band of polish. Both can improve repeatability, but guides must sit evenly and adhere without disturbing the base colour. Stamping also depends on using compatible polish and transferring the design before it begins to dry.
French press-on nails
Press-ons arrive with the French design already placed, so you do not need to paint ten matching curves. Your attention can go to fit, cuticle alignment, nail preparation, and secure application. Readers who want to compare this route with other designs can browse the broader Press-On Nails collection.
Why French Press-On Nails Are the Easiest At-Home Option
French press-ons simplify the most technical parts of a DIY French manicure: creating symmetrical tips, matching the shape across both hands, and waiting for several polish layers to dry.
Premium soft gel press-ons are particularly suitable for a natural French look because they tend to feel lighter and more flexible than acrylic press-ons. When the width and cuticle edge fit correctly, the result can look close and balanced rather than bulky. Acrylic press-ons have a more rigid, structured feel and suit bolder or more sculpted designs.
You can browse French Tip Press-On Nails to compare classic and modern interpretations before deciding how understated or defined you want the tips to look.
With glue, correctly fitted soft gel press-ons can support about 14–21 days of wear. Actual wear depends on preparation, adhesive coverage, nail condition, chosen length, daily activity, and exposure to water. Adhesive tabs are intended for short-term wear of 1–7 days maximum and offer easier removal. Neither route requires a UV lamp.
What You Need Before Applying French Press-Ons
The essentials are clean and dry natural nails, accurate sizing, basic preparation tools, and an adhesive suited to your intended wear period. Check the specific product page before starting because kit contents can vary.
| Item | What it does | What to check |
|---|---|---|
| French press-on set | Provides the pre-shaped French design | Every natural nail has a comfortable side-to-side fit |
| Nail file | Refines the natural nail and, where permitted, the press-on edge | Follow the product instructions before filing a designed nail |
| Cuticle stick | Moves cuticle tissue away from the bonding area | Use gentle pressure and do not scrape living skin |
| Prep pad or alcohol-based cleanser | Removes surface dust and oil | The nail must be completely dry before adhesive is applied |
| Nail glue | Creates the strongest hold for longer wear | Use controlled coverage without flooding the skin |
| Adhesive tabs | Provide temporary hold and easier removal | Match each tab to the natural nail without touching the skin |
Size every press-on before using adhesive. The ideal nail covers the natural nail from sidewall to sidewall without resting on the surrounding skin. Do not force a wide tip downward to make it appear narrower; pressure on the skin can feel uncomfortable and may encourage lifting.
Length also affects practicality. Shorter shapes are usually easier for typing, cooking, driving, and working out. Longer nails can create a more sculpted effect, but they place more leverage on the adhesive during everyday tasks.
How to Apply French Press-On Nails Step by Step
How to Apply Press-On Nails: Step-by-Step for 2–3 Week Wear Size, prepare, clean, apply adhesive, and place each press-on from the cuticle edge with even pressure. The complete application can take around 10 minutes with practice, although careful preparation matters more than speed.
Step 1: Match every press-on to a natural nail
Lay out the full set and find one press-on for each natural nail before opening the glue or removing tab backings. Arrange the nails in order for your left and right hands. Each one should cover the nail plate without overlapping the skin.
If you are between two sizes, follow the product instructions on whether the larger option can be filed at the side. Never compensate for a poor fit by pressing an oversized nail onto the sidewalls.
Step 2: Gently push back the cuticles
Use a cuticle stick to clear non-living cuticle tissue from the nail plate. This creates a cleaner bonding area and helps the press-on sit closer to the base of the natural nail. Keep the movement controlled and stop if the skin feels tender.
Step 3: File the natural nails if needed
Shorten or shape your natural nails so they sit comfortably beneath the press-ons. A practical natural-nail length reduces the chance of an edge showing beyond the chosen tip. Lightly refining the nail surface may improve adhesion where the product instructions recommend it, but aggressive filing is unnecessary.
Step 4: Remove dust, oil, and lotion
Wash away filing dust if necessary, dry your hands thoroughly, and clean each nail plate with a prep pad or suitable alcohol-based nail cleanser. Do not apply hand cream, cuticle oil, or other oily products before application. Even a thin residue can interfere with the bond.
Step 5: Choose glue or adhesive tabs
Use nail glue when you want the most secure, longer-lasting hold. Use adhesive tabs when the nails are for a short event, you expect to remove them within 1–7 days, or easier removal matters more than maximum adhesion.
Step 6: Apply the adhesive carefully
For glue, use enough to create even contact between the natural nail and press-on without allowing liquid to escape onto the cuticle or skin. Too little can leave unbonded pockets, while too much creates overflow and makes removal more difficult.
For tabs, choose a tab that covers the nail plate without crossing onto the skin. Press it down smoothly, remove its protective layer, and avoid touching the exposed adhesive.
Step 7: Align and press the nail into place
Position the press-on close to the cuticle without covering it. Check that the French tip points straight forward, then lower the nail smoothly onto the nail plate. Apply firm, even pressure for the time stated in the product instructions.
Do not slide or twist the nail once the bond has begun to form. This can shift the alignment or create spaces beneath the press-on.
Step 8: Let the bond settle
Keep your hands dry and avoid heavy pressure immediately after application. Delay tasks that repeatedly bend the nails or expose them to water. This gives the adhesive time to form a more secure bond.
French Tip Application Method Branches
Your wear goal should determine the method. Glue supports longer wear, tabs suit temporary use, and painted tips provide more design control at the cost of extra time and precision.
French press-ons with nail glue
Glue is the practical choice when secure, longer wear is the priority. Premium soft gel French press-ons can last about 14–21 days when the sizing, preparation, application, lifestyle, and aftercare all support the bond. Acrylic press-ons usually last up to about 14 days.
Glue also requires more patient removal. Do not use it for extended wear unless you are prepared to follow the removal instructions and wait for the adhesive to soften.
French press-ons with adhesive tabs
Tabs work well for a wedding, dinner, weekend, photo session, or another short period. They generally support 1–7 days of wear at most and are easier to remove than glue. They are not intended to deliver two or three weeks of wear.
Correct sizing still matters with tabs. A press-on that is too wide, narrow, or curved for the natural nail can lift even when the tab itself has been applied correctly.
Painted French tips
Painted tips require the same clean, dry starting point, followed by the chosen base colour, tip design, and suitable top coat. Each layer needs adequate drying time. This route gives you direct control over the smile line but requires more coordination to keep the tips consistent across both hands.
How to Make French Tips Look Natural
Natural-looking French tips depend primarily on accurate sizing, close cuticle placement, balanced length, and a tip line that suits the proportions of the nail.
The press-on should sit flush over the nail plate without covering the skin. Before the adhesive fully sets, look at the nail from the front and side to confirm that it is straight. Compare corresponding fingers on both hands so the visible lengths and tip angles feel balanced.
Design direction also changes the effect. Parisian Kiss french tip press-on nails offer a classic French direction, while Cappuccino Grace Press-On Nails introduce a mocha-toned interpretation. For deeper contrast, After Dark French Press-On Nails take the design in a darker direction. Check each current product page for its exact specifications, kit contents, and price.
A thinner, shorter French profile generally reads as more understated. Longer or more sculpted designs draw more attention to the tip and create a bolder finish. Neither is inherently more natural; the more convincing option is the one that fits your nail width, hand proportions, and everyday activities.
Common French Manicure Mistakes and Troubleshooting
Most press-on problems begin with incorrect sizing, oily nail plates, uneven adhesive, or movement before the bond is secure. Correcting the cause is more effective than covering the problem with additional glue.
| Problem | Likely cause | Practical fix |
|---|---|---|
| Lifting at an edge | Oil or dust, poor fit, incomplete adhesive coverage, or early water exposure | Remove the nail according to its instructions, clean and dry the area, reassess the fit, and reapply. Do not pour glue under a partly lifted nail. |
| Visible gaps at the side or cuticle | The nail is too narrow or was placed too far from the cuticle | Choose a better-fitting size and align it again rather than forcing the current nail into place. |
| Crooked French tip | The press-on was not checked from the front before pressure was applied | Remove and reapply promptly if the adhesive method and instructions allow. Do not twist a nail after it has bonded. |
| Glue on surrounding skin | Too much adhesive or pressure | Stop, follow the glue instructions for safe cleanup, and use less adhesive on the next nail. |
| Uneven visible lengths | The set was not compared before application | Arrange and compare all nails first. File only where the product instructions permit. |
| Nail feels tight or uncomfortable | The press-on is too curved, narrow, or small | Remove it carefully and choose a size that sits comfortably without forced pressure. |
Never pick, tear, or forcibly pull off an attached press-on. A nail that remains firmly bonded needs more time and the appropriate removal process.
How to Remove French Press-On Nails and Care for Natural Nails
How to Remove Press-On Nails: Safe Method Remove French press-ons by following the product-specific method, softening the adhesive as directed, and lifting gently only when the bond has released. Glue requires more patience than adhesive tabs.
Begin at an edge that has naturally loosened, and do not force a tool beneath a firmly attached nail. If you feel strong resistance, stop and continue the recommended soaking or softening process. Pulling can remove surface layers from the natural nail and may also damage the press-on.
Glossy Way press-ons can be reusable when they are removed gently, cleaned as instructed, and kept in good condition. Reuse is not assured after every application because the condition of the nail and any remaining adhesive will vary.
After removal, clear residual adhesive according to the product instructions and treat the natural nails gently. Avoid aggressive scraping or filing. A successful application and removal cycle leaves the press-ons comfortable during wear and avoids picking or tearing at the natural nail.
Before considering the manicure complete, check for secure edges, even alignment, comfortable sizing, balanced tip lines, and no adhesive on the surrounding skin. These details matter more than applying the set as quickly as possible.
Frequently Asked Questions About French Manicures at Home
What is a French manicure?
A French manicure combines a sheer, nude, or pale-looking base with a contrasting tip that follows the free edge of the nail. The traditional tip is white, although modern French manicures can use other colours, metallic effects, glitter, or sculpted details.
French tip nails are nails with a visually distinct tip and base. The recognizable feature is the defined smile line between them, not one specific colour combination or nail length.
How do you do French tip nails at home?
You can paint the tips freehand, use guides or stamping tools, or apply pre-designed French press-ons. For press-ons, size every nail first, prepare and clean the natural nails, choose glue or tabs, align each nail at the cuticle edge, and press it down evenly.
Are press-on nails easier than painting French tips?
Press-ons are generally easier when your priority is consistent tip placement and a fast result. Painting gives you more control over colour and line width, but matching the curves on both hands takes practice and requires drying time.
Should I use glue or adhesive tabs?
Use glue when you want a stronger bond and longer wear. Use adhesive tabs when you need the manicure for a short period of 1–7 days and want easier removal.
How long can French press-ons last?
Premium soft gel press-ons can last about 14–21 days with glue when fit, preparation, application, lifestyle, and aftercare are all handled correctly. Acrylic press-ons usually last up to about 14 days. Adhesive tabs are for 1–7 days of wear maximum.
Can French press-ons be removed and reused?
They can be reusable when the product is designed for it and the nails are removed gently, cleaned according to the instructions, and kept in good condition. Reuse depends on the condition of each press-on after removal and cannot be assumed after every application.
Conclusion
A French manicure pairs a natural-looking base with a clearly defined tip. You can paint the design freehand, use guides or stamping tools, or avoid drawing the curves by applying pre-designed French press-ons.
For the simplest consistent result at home, choose a French press-on design, size every nail before applying adhesive, and prepare the natural nails carefully. Use glue for longer wear or adhesive tabs for a temporary manicure and easier removal.